

With over 500k agile projects in Jira (among just Cloud customers – wow!), we realized we’re sitting on a ton of data that sheds light on how agile teams function. We then bet, that with some anonymized data mining, we could find teams that have a release cadence that they hit sprint after sprint after sprint.
One thing that stood out during our research is teams who release early and often – let’s call them “release-ready teams“.
Teams who release early and often typically have about 30 issues in a sprint.
To find your team’s sweet spot for the number of issues in a sprint, your team needs to recognize when an issue’s scope is too big. And once you realize that, you need to do something about it and make changes in Jira to reflect those changes. Should the original story become an epic? Or should it be broken down into smaller stories or tasks? Where do sub-tasks fit in?
To answer these questions, let’s walk through how to properly break down issues, and keep it all tied together in Jira.
Understanding versions, epics, and user stories
Recent Jira Portfolio blogs have done a really good job at laying down the fundamentals for Tip: If you’re familiar with Jira keyboard shortcuts, you can press “e” to access Quick Edit and change the issue type if your Jira administrator has made that available in your field configuration.
Next, it’s time to create issues for the user stories that make up your feature and associate them with your new epic. Creating issues in Jira is well-documented, but there are a few tricks you might not know of yet:
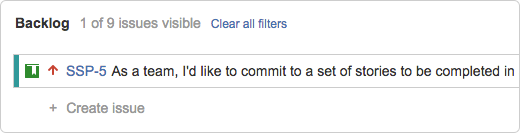
- If you create a new issue using the Create button at the top of the screen, your issue will be automatically added to the top of your backlog.
- If you have an issue selected in the backlog when you hit the Create button, your new issue will appear right below the selected issue.
- If you assign the issue to a sprint when creating it, the issue will be added to the bottom of that sprint.
- If you’re in the backlog and click the + Create Issue link shown below a sprint, Jira will add attributes to match the board and any filtering applied – e.g., if your board is currently showing only the issues associated with the “Mobile Client” epic, issues created this way will automatically be associated with the “Mobile Client” epic.
And speaking of associating issues with epics, this is dead-simple.
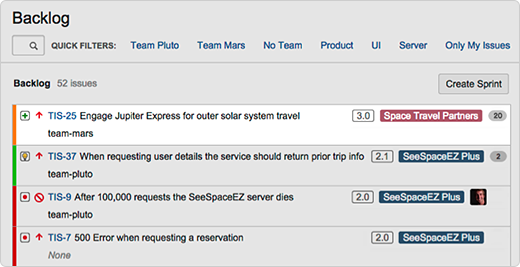
- Go to your backlog and click the Epics link on the left side so all your epics are visible.
- Select an issue from the backlog and drag it over to the list of epics.
- Drop the issue on the epic you want to associate it with. Boom. Your issue now shows a colored lozenge with the epic’s name.
So that’s how you change the issue type to match its large scope if it has one. Conversely, if your user story is not a whole feature, but it’s more work than one person could complete in a single sprint, it needs to be broken down into multiple issues. Recognizing when that’s the case comes down understanding your team’s estimates.
The Jira marketing team, for example, uses story points for estimation. When a user story is estimated at 20 points or more, we take that as a red flag: the issue’s estimate is too big to fit in our two-week sprints. This is a team rule based on how we calibrate story points – your milage warning sign may vary. But just for fun, let’s say your development team is similarly calibrated and also does two-week sprints. Twenty story points would signal that a user story contains too many unknowns or is simply too ambitious. It’s then up to your team – some combination of product owner, developers, testers, and scrum master – to decompose it into smaller issues.
Tip: Check out our guide to managing projects, from idea to execution to iteration.
Cloning and linking and sub-tasks (oh my!)
If you decide a user story should be broken down into two issues, copying, or in Jira terms, cloning the issue is your best option. With cloning, the new issue will contain all the same information as the original: summary, issue type, sprint, epic, version, due date, assignee, etc. Obviously, the descriptions will need to be updated (essentially, divided in two) to reflect the intended scope of each issue. The assignee and fix version on the cloned issue might need to be changed as well, depending on the situation.
If you’ve never cloned an issue before, here’s a quick how-to:
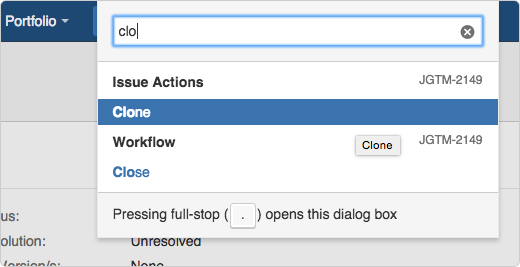
- Open up the issue and select the More drop down in the actions section.
- Click on Clone which will take you to a dialog box prompting you to enter the summary of the clone issue.
- Press Edit and make your edits just like you would with any other issue.
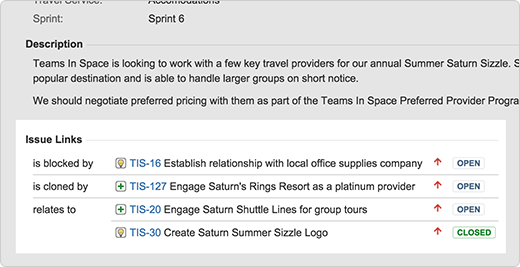
Another benefit of cloning is that the new issue will appear in the original issue’s issue links section with the link type “is cloned as” and a reference to the new issue. Similarly, the new issue’s issue links section will contain a reference to the original issue with the link type “is cloned from.”
Linking is awesome because it lets you create relationships between issues. Jira comes with a few basic link types like “is cloned as/is cloned from” and “blocks/is blocked by”, but you can work with your Jira administrator to add any custom link type you can dream up. The sky’s the limit! For example, here at Atlassian we added the custom link type “causes/is caused by” to reflect situations where a code change introduces a new bug.
Once two issues are linked, their relationship will show up in the issue links section. You’ll also see the priority and status of the linked issue, which means no more toggling between issues or searching to check to see if the issue you were waiting on is done.
Regardless of whether or not you’re trying to split up issues or generally organize your issues for a project, linking is simple. Here’s how to link issues:
- Open up the issue and select the More drop down in the actions section.
- Click on Link or start typing which will take you to a dialog box prompting you to enter the relationship and the issue you’re establishing the relationship with.
- Press Link and the link will show up in the Issue Links section of the issue.
You can also save time by using the operations dialog box I mentioned above.
And then there were sub-tasks. Some teams use them to enumerate the discrete steps involved in completing an issue. Other teams like them because, in cases where multiple people are required to complete the issue, five sub-tasks can be assigned to five different people instead of having to change the assignee. Like linking, your administrator needs to enable sub-tasks, but once that’s done, all you need to do to create a sub-task is go to the More menu and select Create Sub-Task. You can also convert an existing issue into a sub-task from the same menu.
Sub-tasks are typically added during backlog grooming or sprint planning – the same situations in which you’d decide that a user story needs to be decomposed. This can help estimation because it’s easier to see the end point when this issue is smaller, so your estimates are naturally easier to come up with and tend to be more accurate.
Like everything else in Jira, sub-tasks are customizable. If you don’t want user stories to move to the next workflow status until all the sub-tasks are complete, you can make it so. They’re just another tool to help your team to plan smarter and find your release rhythm.
Have more questions about epics, versions, and release planning? Check out what others have done on the Atlassian Community
Tip: All sub-tasks need to be complete in order to close a sprint. If a sub-task is still open, but the parent issue could justifiably be closed (say, if the sub-task for updating documentation is still open but the functionality is good to go), you can change the sub-task into an issue and close your sprint. Just be aware that this might show up in your sprint reports as scope creep.
Habits of release-ready teams
Even though 30 issues per sprint seems to be the sweet spot for release-ready teams in over 500k agile projects in Jira, what really matters is that issues are scoped such that they can be completed during your sprint. If you can identify when an issue is too ambitious and convert it into an epic or decompose it into smaller issues, you’ll be setting yourself up for success and helping your team be release-ready sprint after sprint.
We found other patterns and common trends amongst release-ready teams, too. See what else we learned in our newest infographic: The Release-Ready Team.