
We make tough decisions at work every day that require collaboration and deliberation – that’s what makes them tough. Some teams rely on meetings to make big decisions, but it’s not always easy to do in person. What happens then? More meetings! Sometimes, it’s just easier to make a decision asynchronously. And for that, there’s no place better than Confluence.
We have a saying around Atlassian: decisions don’t require handshakes. It means you can decide on things and keep the ball rolling online, without actually needing to press some flesh, as it were.
The Decisions Blueprint provides a simple, repeatable process for making decisions asynchronously with your team and recording them forever in Confluence. And once everything’s in Confluence, you—and anyone on your team—can reference it later.
Let’s take a look at five steps to setting up a decision page in Confluence.
Step 1. Define what, who, when
There are three key components to every decision.What do we need to decide? Who are the stakeholders that need to make this decision? When does it need to be decided by?
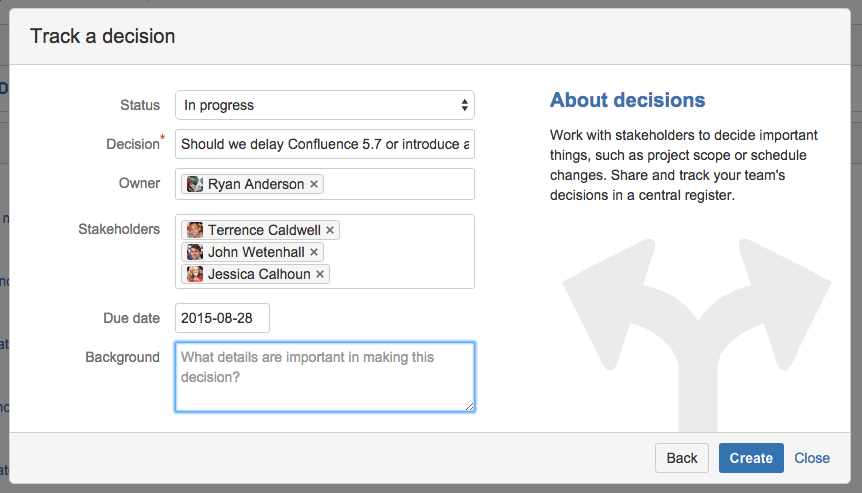
Declare what the group needs to decide
Usually this is best answered with another question. What should we name our new Q&A add-on for Confluence? (Answer: Confluence Questions ![]() ).
).

It’s best to ask this question in the page title. This makes it a lot easier to find the decision later if you need to search for it.
Define the stakeholders and the decision owner
With any decision, a sometimes overlooked step is defining roles. There are two groups: the owner and the stakeholders. The owner is the person who has final say. This is likely the page author, but could also be the team leader or executive. The stakeholders are the people who help make the decision. This is the pool of people that this decision will affect.
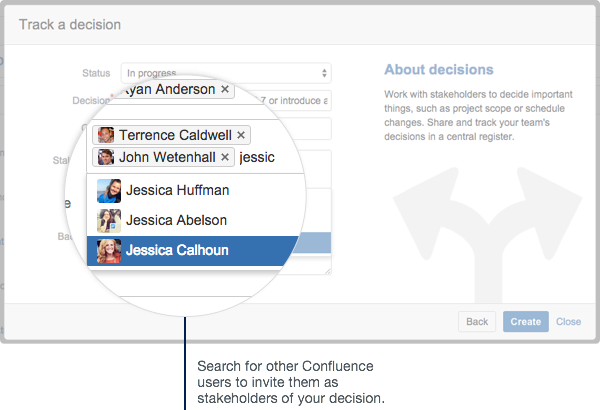
Use @mentions to share the page with the owner and stakeholders. This will automatically send them an invite to contribute—bringing them into the decision page—once the page is saved. This saves time, since you won’t need to the share the page after you’ve completed it.
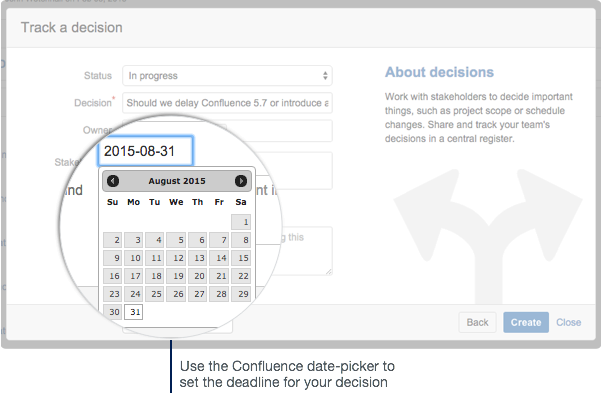
Define when the decision needs to be made
That’s the thing about decisions: you can’t debate them forever. Set a drop-dead date using the date picker so everyone knows how time sensitive their contributions are.
I recommend that you use the Confluence editor to write down the background of your decision. This will give you the space and tools to offer a complete context filled with links, images, and even video.
Step 2. Write to provide context so everyone is informed
Organize
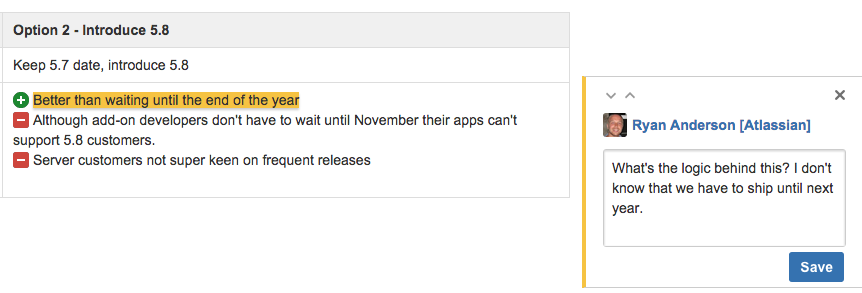
Since you’re not hosting a meeting, you need to make sure everyone has all the information before contributing their thoughts. In most cases, you’ll have options like A and B. Use Page Layouts to organize your page and separate your options.
A good tip to working with Page Layouts is to click the ‘Add Section’ button a few times to give yourself some blocks to work with. Place your cursor in the second page layout block and click the two column layout.
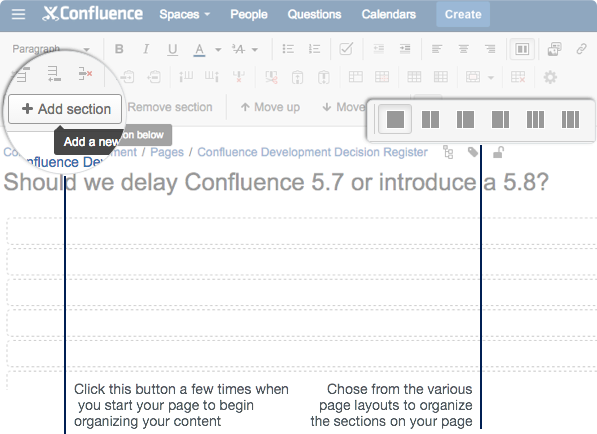
From here you can begin to set up your two decisions. Add a heading to your first column. A quick way to add a Heading 2 is by typing “h2.”
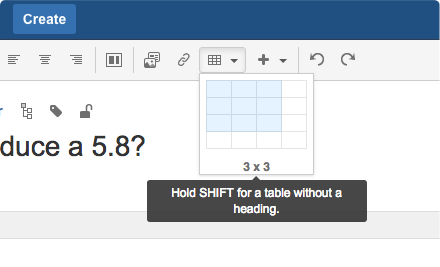
From here, I usually like to organize the options using tables. Tables are powerful tools for organizing information and they make your page highly readable. You might want to create a simple pro/con list for Option A. This is simple. Choose a two column table and drag to 5 or 6 rows. You can always add more later.
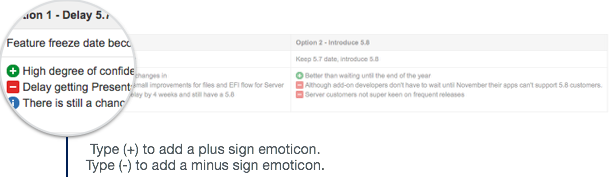
Give each of your table columns a heading. And then, using the ![]() and
and ![]() emoticons, you can start creating a list. For a check mark, type ‘(/)’ and for a negative mark, type ‘(-)’.
emoticons, you can start creating a list. For a check mark, type ‘(/)’ and for a negative mark, type ‘(-)’.
Make it visual
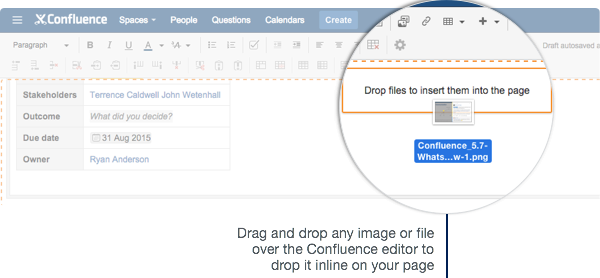
There will be decisions you make where it’ll be helpful to include images. Confluence makes it easy to do. If the image is on your computer, you can just drag-and-drop the image into your page, bringing the image inline in the Confluence editor and attaching it to the page.
Link to other information
One of the best parts of Confluence is linking. When all of your work and documentation is in Confluence, it’s easy to link to it and make your teammates aware. This can be really helpful for providing background for a decision. There are a couple ways to link to a page and you can read more here. In this post, I’ll only show you the fastest way: using autocomplete for links.
Type ‘ [ ‘ and you’ll see a list of your most recently viewed pages.
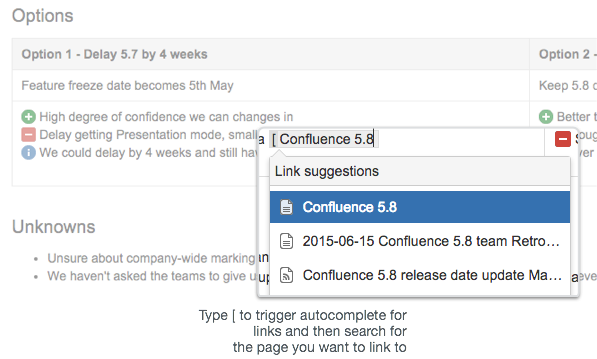
As you type, you can search across Confluence for the page you want to link to. It’s that simple. If you have the Confluence page link already, you can just paste it directly into the editor and Confluence will automatically convert it to a link of your page title.
Step 3. Discuss everything and reach consensus
You’ve already shared your page with the stakeholders using @mentions, but if you want you can share your page again using the Share button. This will send your teammates a notification to visit this page.
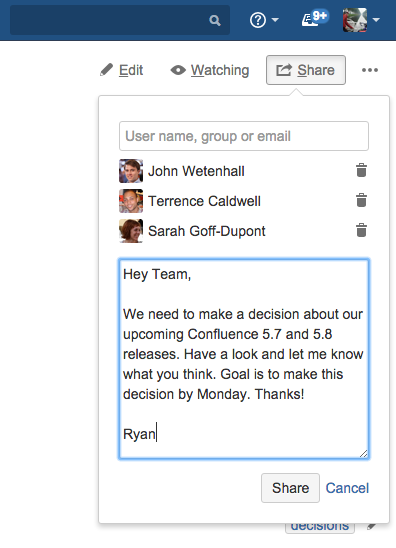
Once you have everyone on your decision page it’s easy to foster meaningful discussion. Anyone can comment or like to give feedback, work out details, debate possible solutions, and reach consensus. With all of your conversations in one place, you’ll never have to waste time digging through your inbox to find an email thread again.
You can leave a comment at the end of the page:
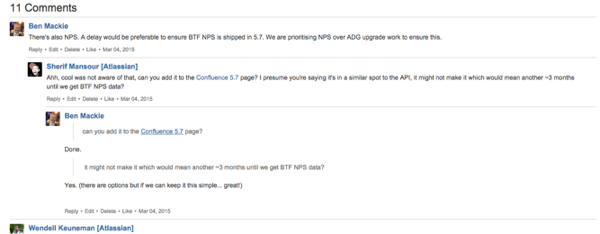
Or you can leave a comment inline, typically to seek clarification or point something out that you’d like clarification on. To do this, just highlight any text on the page:
Step 4. Record all the things to keep everyone informed
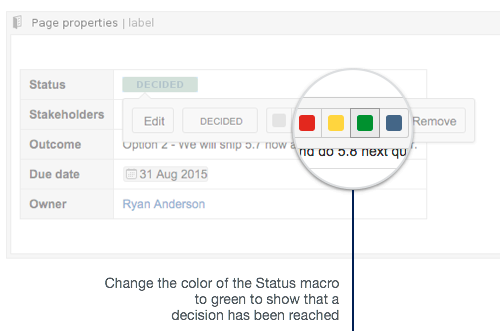
Once your team has reached a decision it’s just as easy to record it in Confluence. Change the status of the decision, using the Status Macro, so everyone who contributed is notified. With everyone on the same page (literally!), it’s easy to keep progress moving forward.
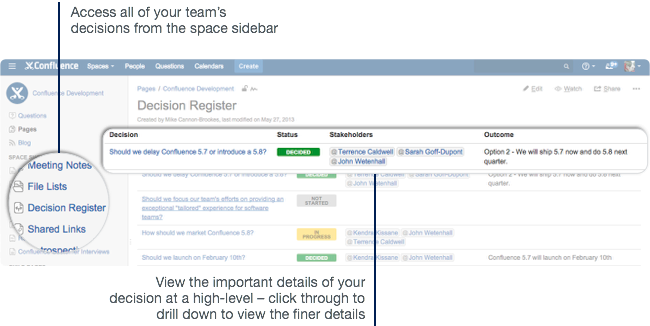
Step 5. Collect every decision in one place
Want to refer back to see why a decision was made? The Decision Blueprint automatically indexes your decisions on a single page. Now all your decisions are accessible to anyone who needs them, whenever they need them.
At a glance: start making better decisions in Confluence
Creating this page might seem daunting with all the macros, but making informed decisions as a group is worth the work. It gives your team one place to discuss your options and save yourself long meetings and even longer email threads. In the long run, you’ll be happy that you can make a decision once. Here’s a list of what we covered:
- Page layouts: organize your page with different column layouts
- Emoticons: use the
") and
and ") to give your page some color
to give your page some color - Tables: these are awesome tools for organizing your thoughts
- Adding images: drag-and-drop is the fastest way to insert an image or file into a Confluence page
- Linking: with all your work in Confluence, it’s easy to link off to relevant pages using Autocomplete
- Comments: leave your overall comments at the end of the page and your targeted comments inline
- Status macro: stamp your decision made by updating the color and text
Hope this was helpful! Got an awesome decisions page? Tweet a screenshot of it to us @Confluence and you could win some swag!
This post is part of our latest collection, A Software Team’s Guide to Confluence. Click the lovely green button below to see more.
And if you found this article helpful, please share it on your favorite social network and help spread the Confluence knowledge!