
We’ve written quite a bit about the conundrum of writing requirements in an agile environment. The most important takeaway is: the best way to kick-off your software projects is to build a shared understanding amongst your team. At Atlassian we find the best way to do this is to create a collaborative product requirement to hash out details for large complex epics. When your requirement doc is created and the details are all in one place, it makes it a lot easier for Development and Design to provide immediate feedback and input. When this happens you can iterate quickly and implement work right away. Here’s how you can create that requirement and build a shared understanding in Confluence:
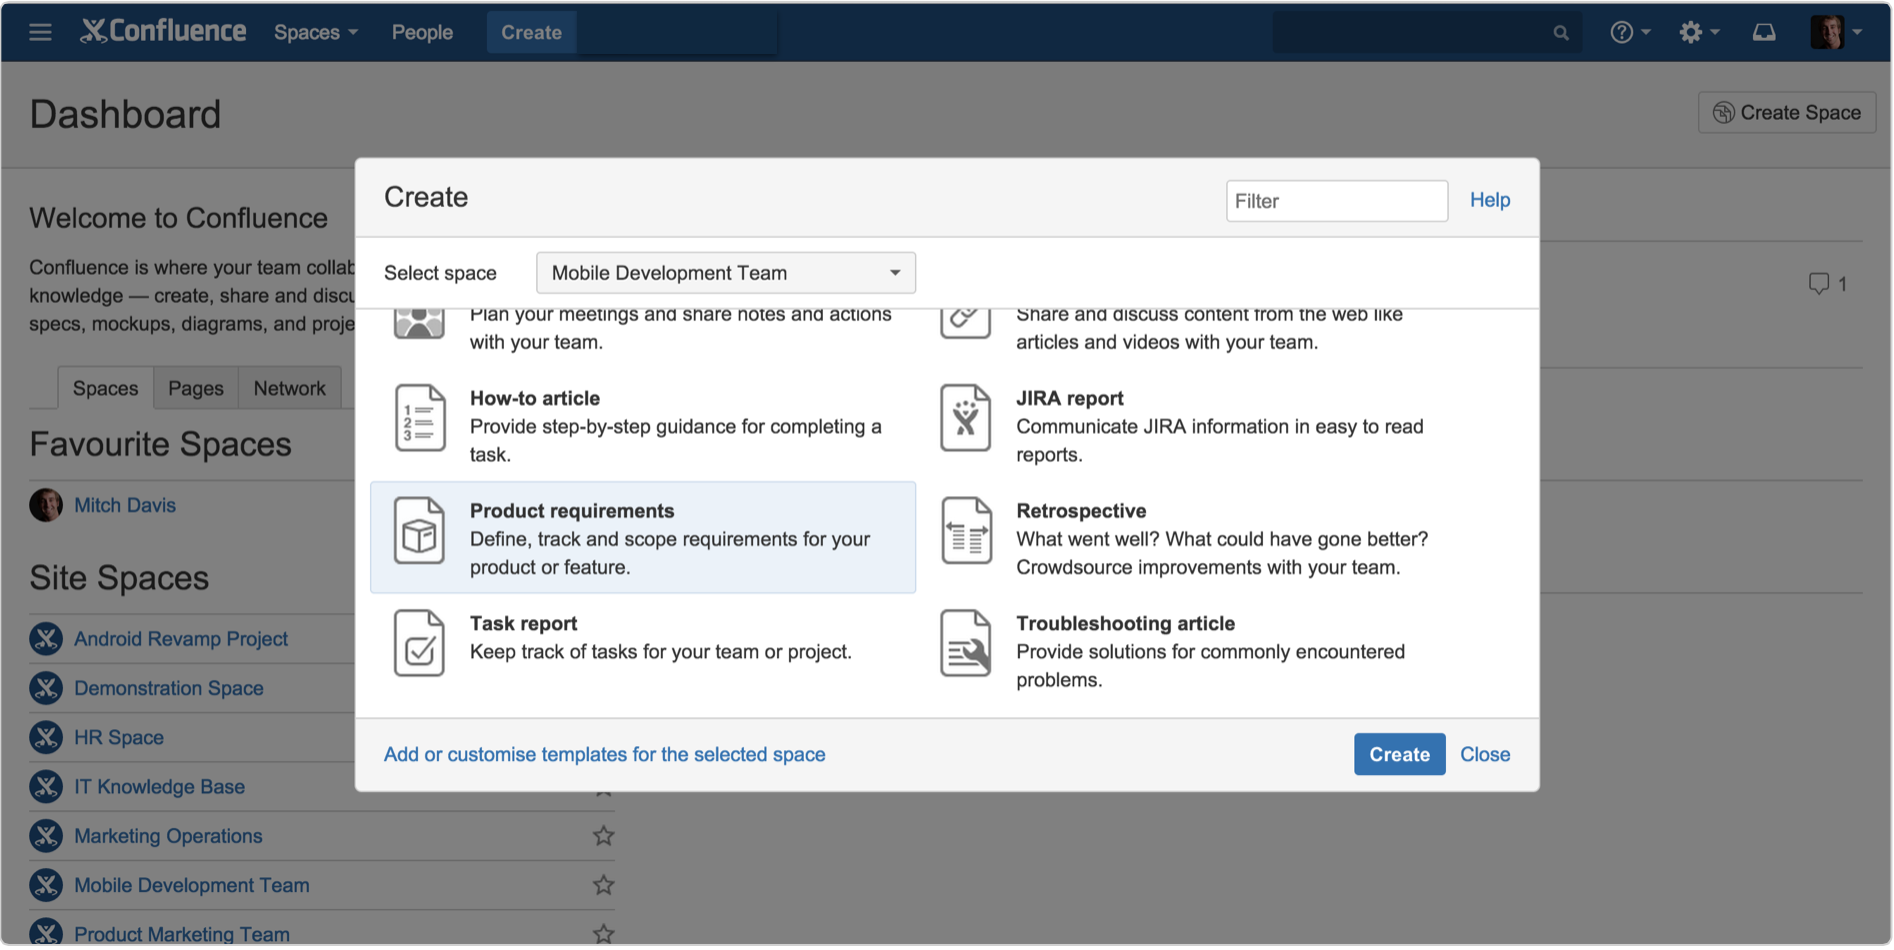
1. Start with our Product Requirements blueprint
Get started with the special template that we’ve included. The template will help point you in the right direction, and provide some best practices for what content to include.
2. Communicate key details
Your requirements page might be laser focused on a particular feature, or it might include requirements for a release that includes multiple features. Either way, you should capture key high level details at the top of the page for easy reference.

- Participants: Who is involved? Use @mentions to include the product owner, and other stakeholders.
- Status: What’s the current state of the program? Use the status macro to quickly show if you’re on target, at risk, delayed, deferred, etc.
- Target release: When is it projected to ship? If you use Jira, link to your Jira project.
Pro tip: When you create your first product requirement doc in Confluence you’ll notice the project details are in a table located in a page properties panel. The page properties macro is a powerful macro that allows you tocreate a summary page that pulls in information from multiple pages. In this case, a summary page could bring in each of the fields in your table so you can see who is involved or the status of a given requirements page. Keep reading to see what that summary page looks like
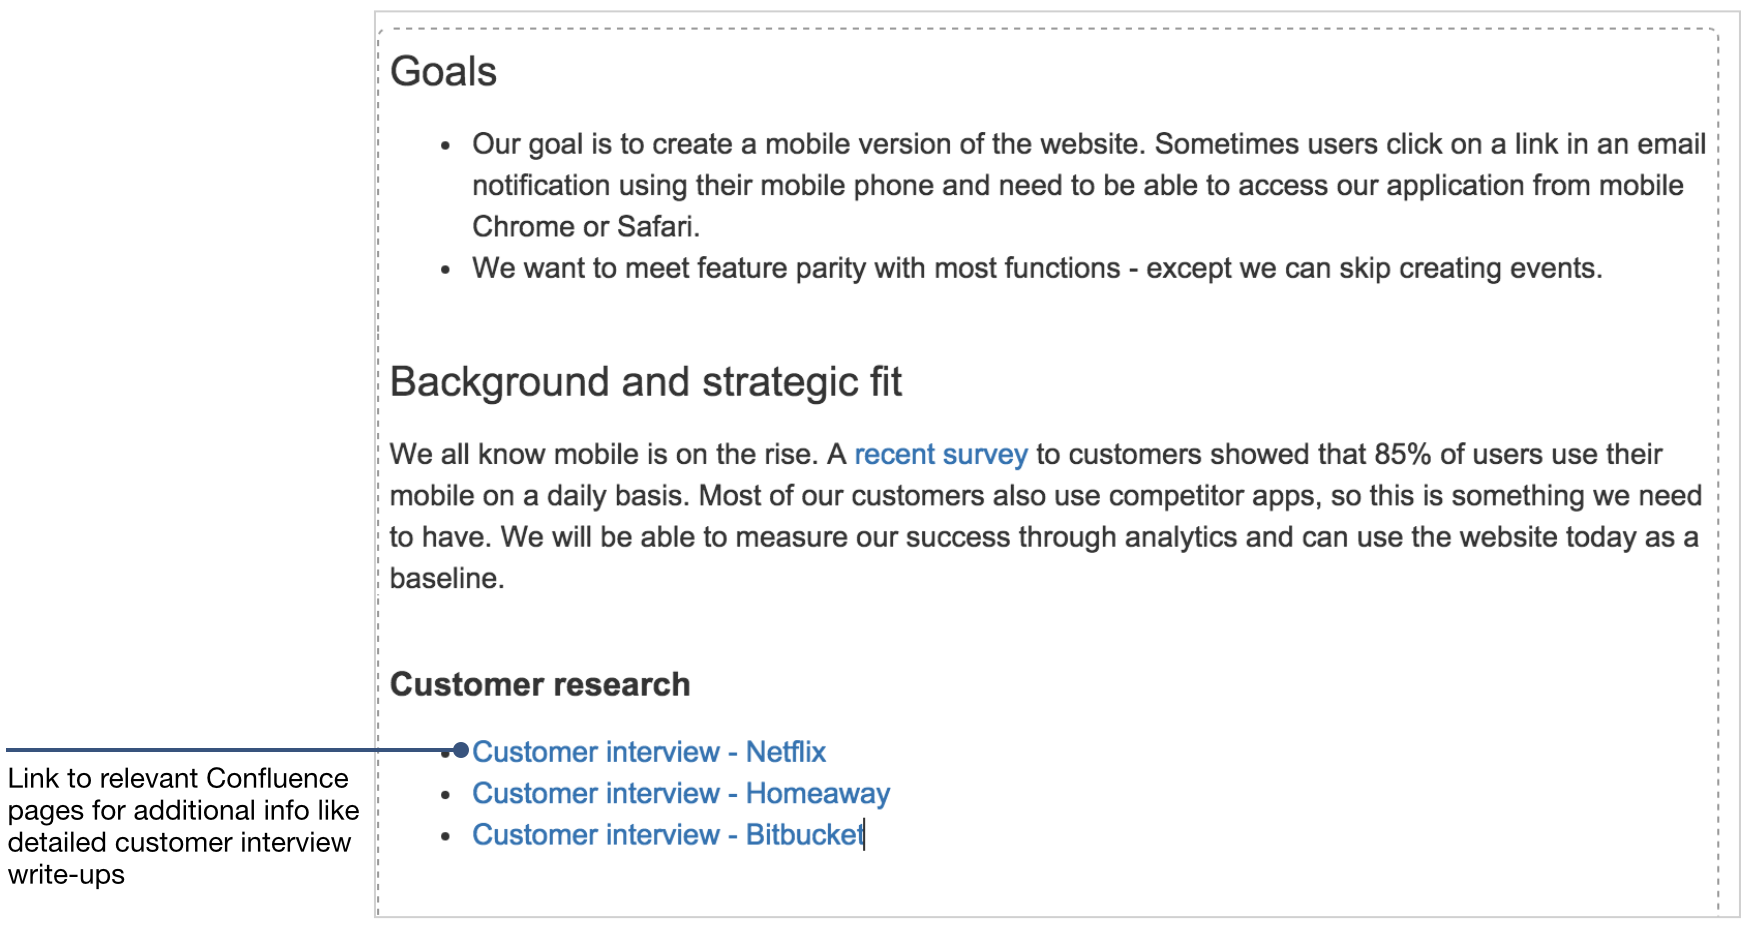
3. Outline goals, business objectives, and strategic fit
The team goals and business objectives section is meant to give you a chance to add some color and context to your requirement.
A good way to think about your goals is from your customers perspective. What exactly are they trying to achieve? How does the solution you’re proposing fit into it?
This is a great place to link to other Confluence pages to provide more detail including customer interviews, and planning pages.
4. Create user stories
Use a table to list out your user stories, along with description, priority, and notes. This table is another great place to link to more detailed research pages, and customer interviews.

Pro tip: It’s really easy to turn the user stories you write in Confluence into Jira issues. When the page is saved, just highlight the user story text, and Confluence will give you the option to create Jira issues. If you have a full table full of user stories, you can convert them all into Jira issues at once.
5. Review user experience and design
Drag-and-drop design files to embed them on your page. If you’re embedding multiple design assets use the Attachments macro to create a quick repository of all the files that are attached to the page.
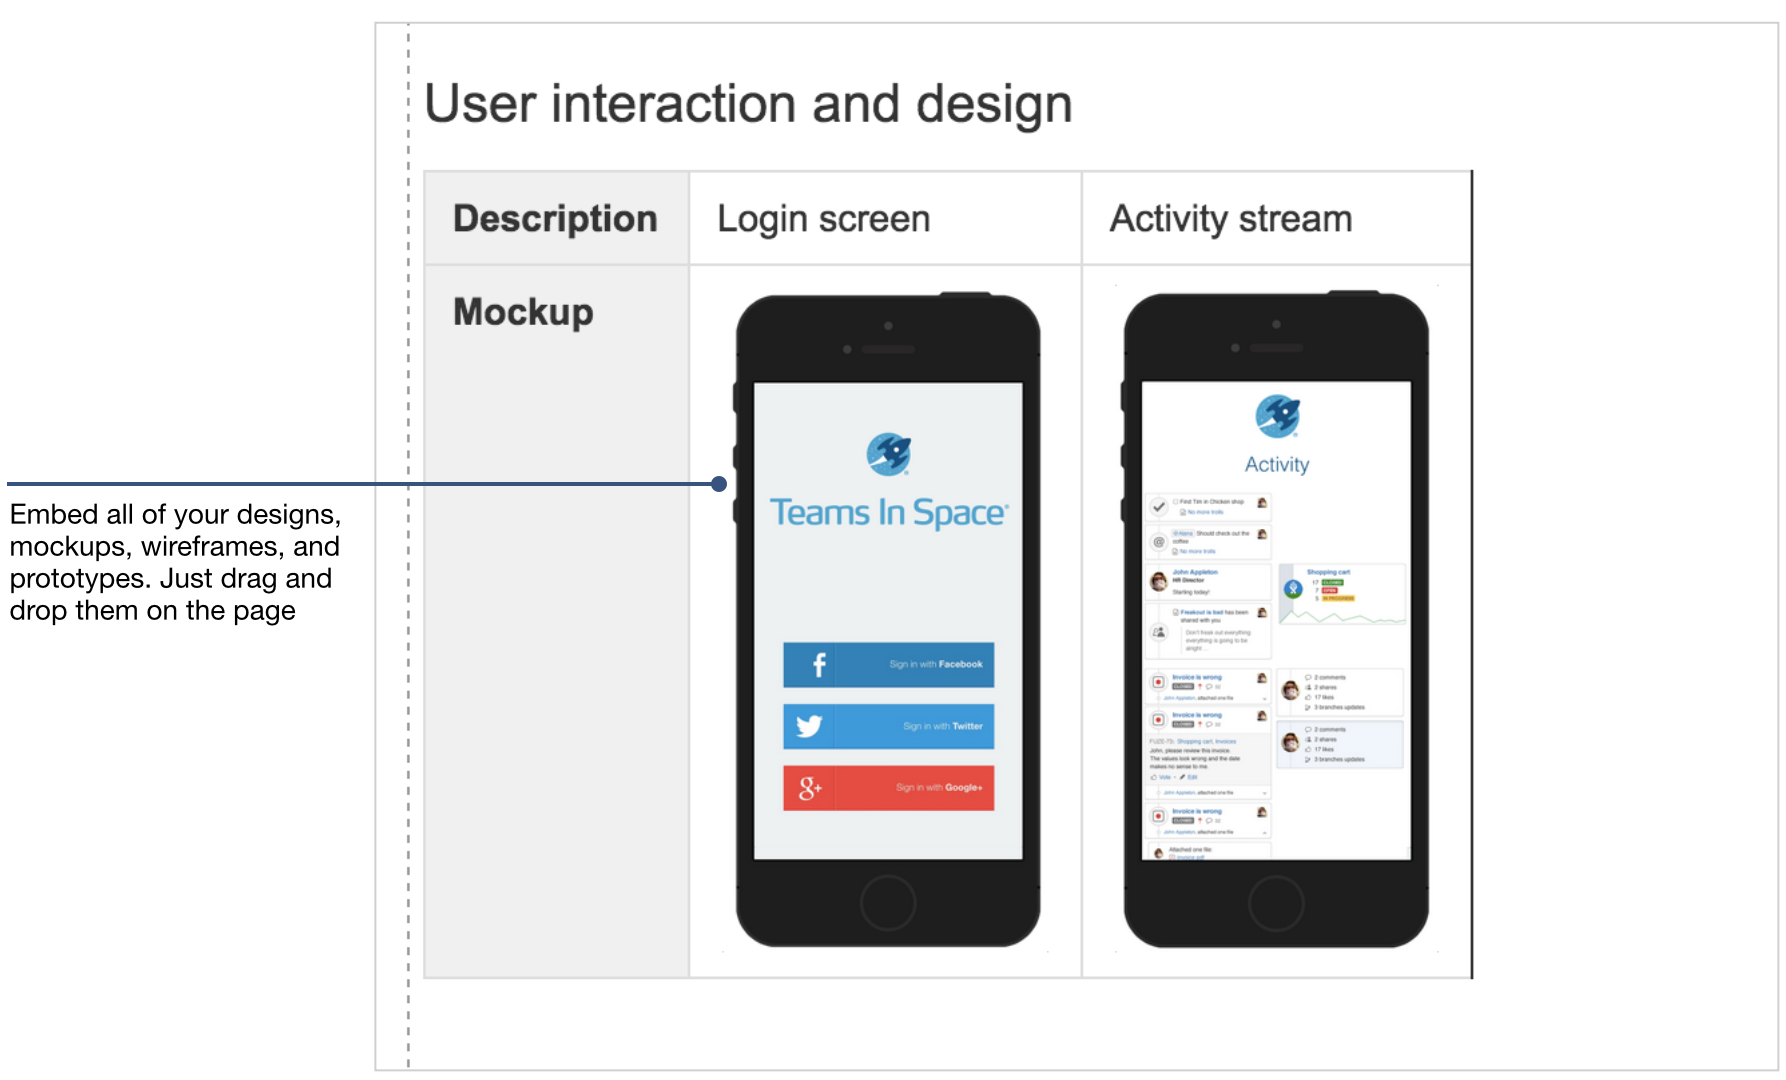
Pro tip: Confluence is perfect for collaborating on wireframes, mockups, and design prototypes. Use the rich file viewer to preview PDFs, images, and powerpoint presentations. You can also pin comments directly on files to provide feedback in context. Your design, and dev team can spar on early mockups on the same page.
6. Address questions and clarifications
As the team understands the problems to solve, they often have questions. Create a table of “things we need to decide or research” to track these items.
Keep the team focused on the work at hand by clearly calling out what you’re not doing. Flag things that are out of scope at the moment, but might be looked at later.

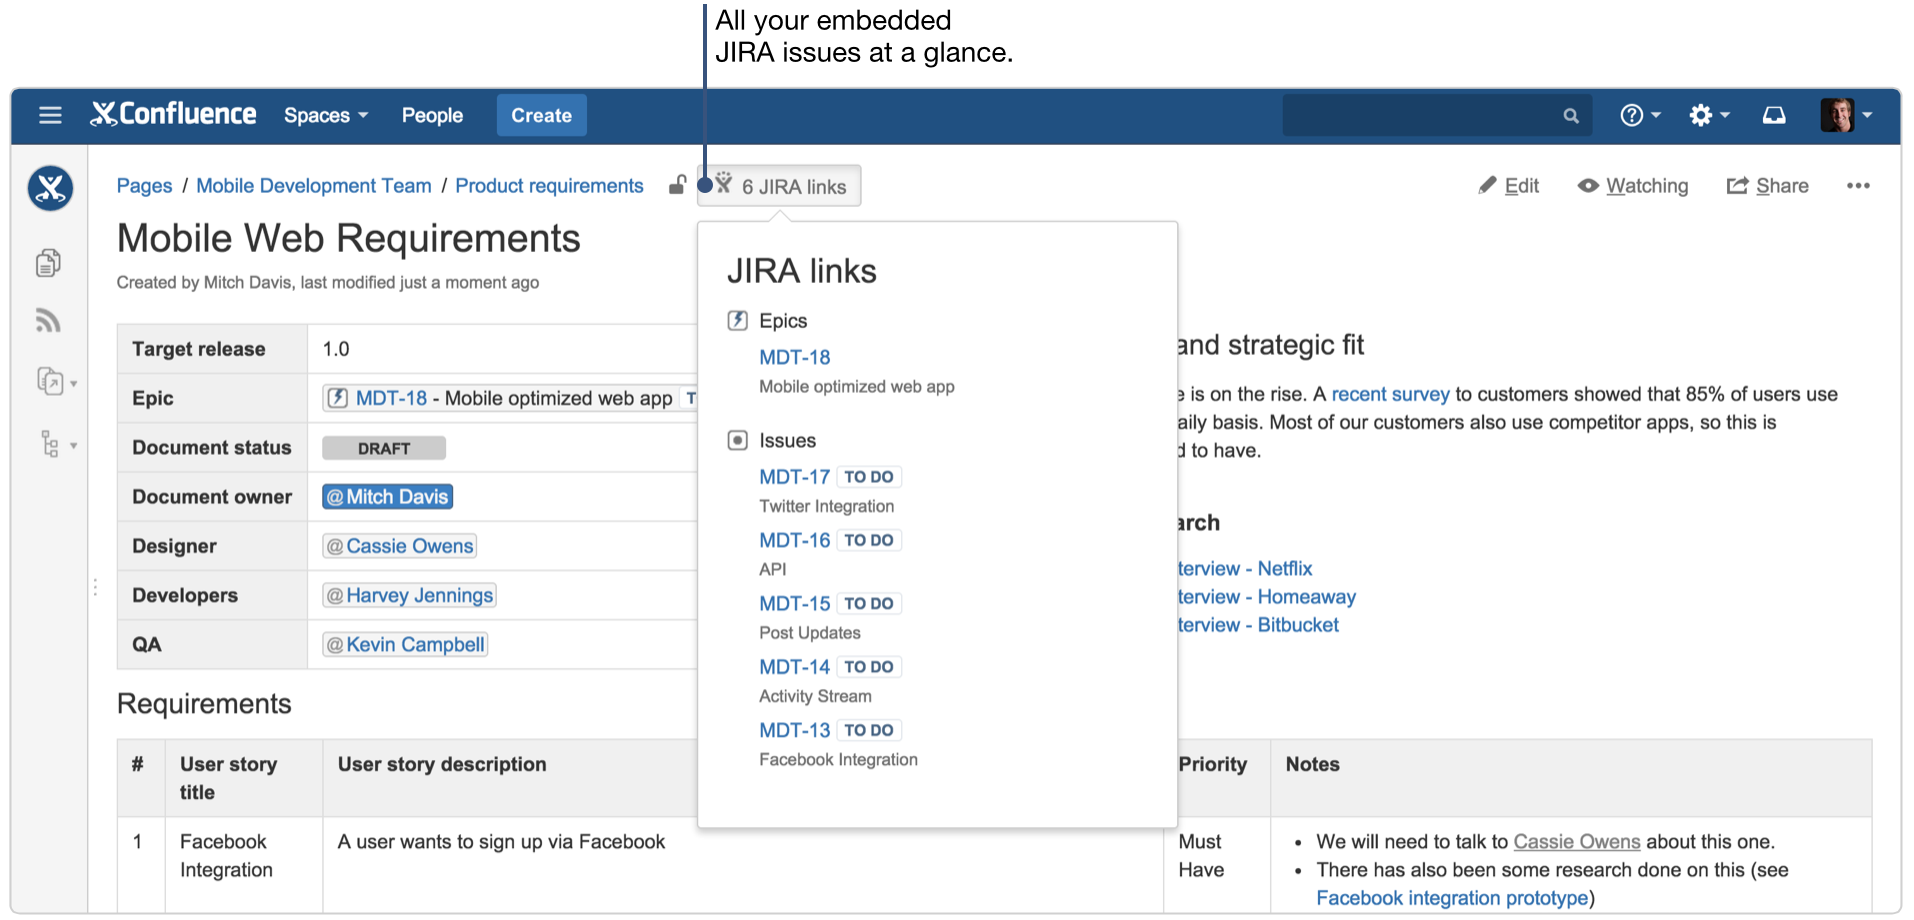
7. Trace requirements to Jira issues
Most likely you and/or your development team spend a lot of time in Jira. That’s fine! It’s really easy to get from your Confluence requirement to your Jira epic and vice versa. You can view all the Jira links on any Confluence page, by clicking on the Jira links button at the top of your saved page.
8. Your Product Requirements index page
You’re probably not just working on one project. Confluence automatically creates an index page that pulls in the key details of all your team’s product requirements. You can always access this index page in the Space Sidebar.
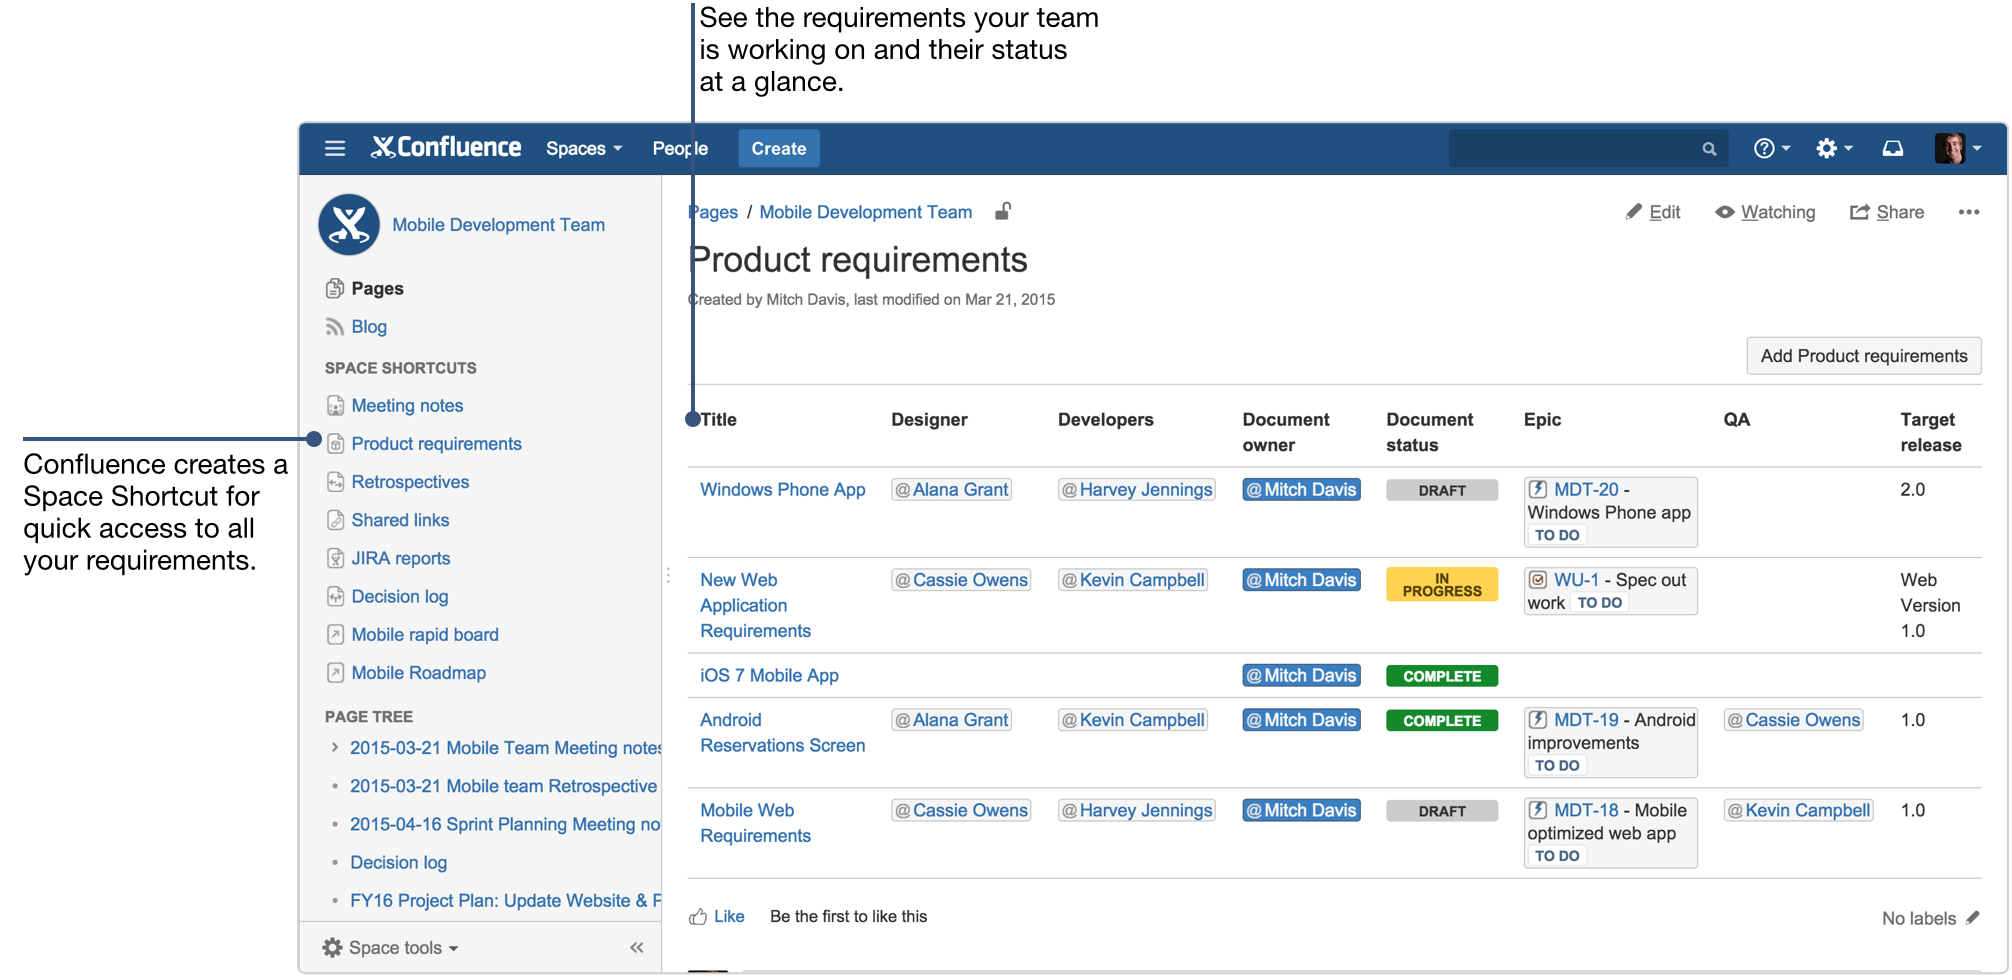
It’s a handy way to see what your team is or has been working on at a high level. Just like any page in Confluence you can edit this index page as you see fit.
Bonus: Customize the template to fit your team’s workflow
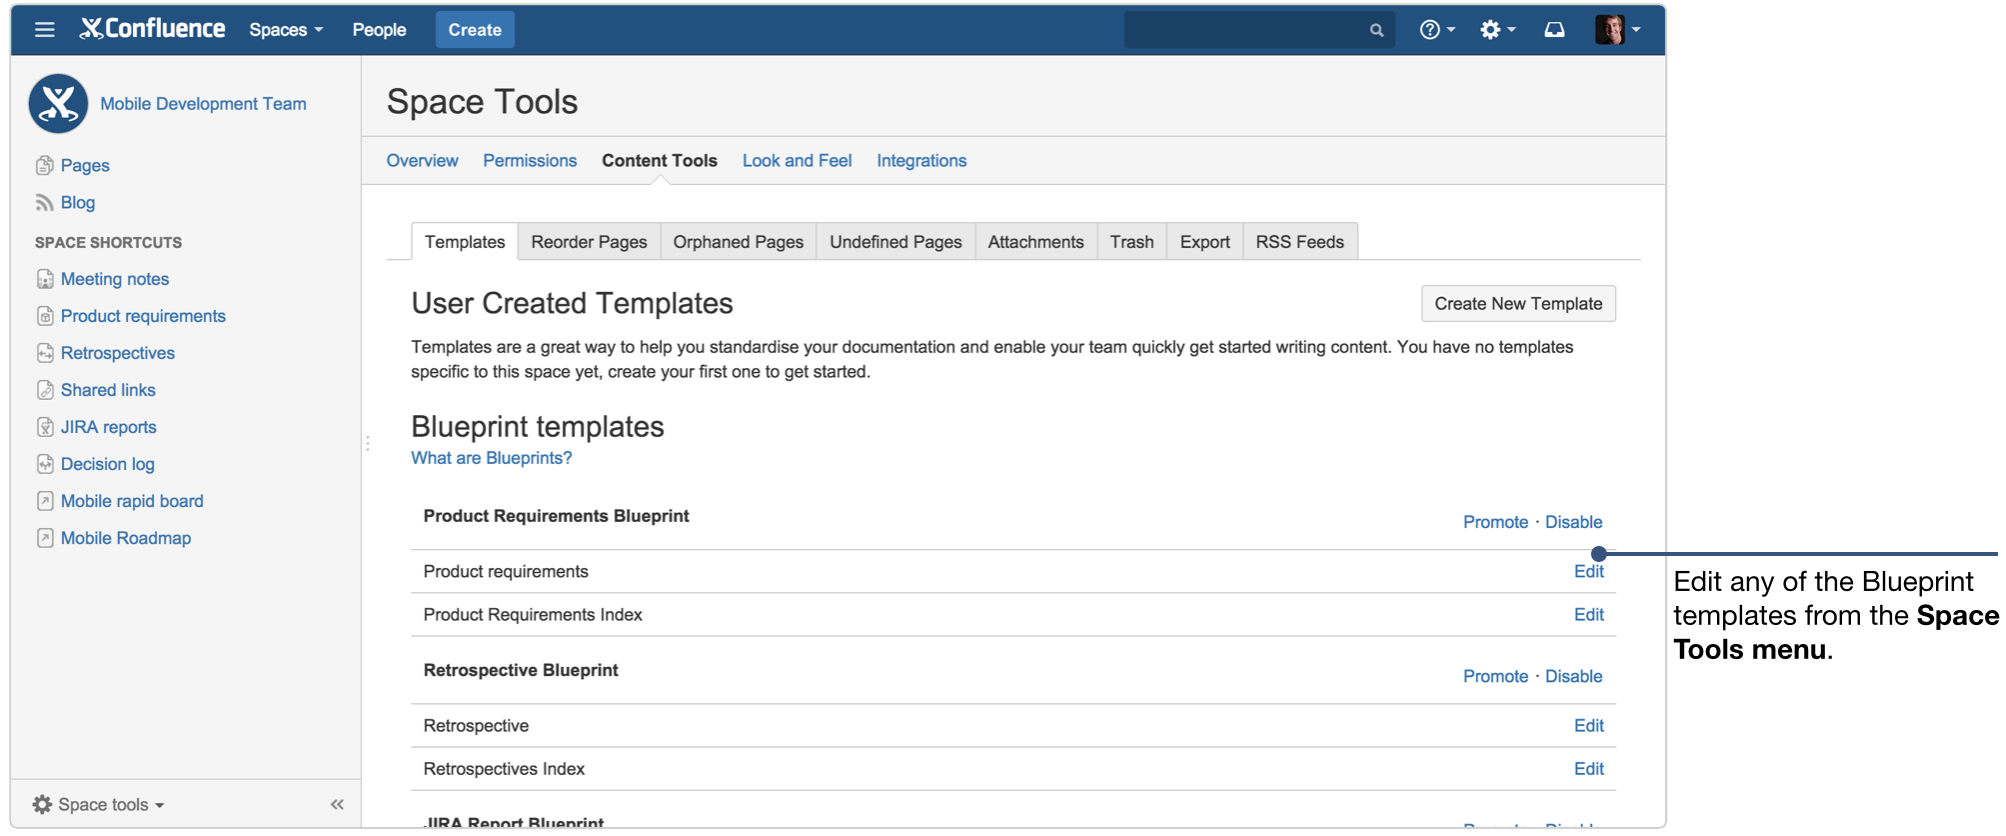
You can edit the Product Requirements blueprint at any time and tailor it to fit your team’s specific needs. If you want to edit the template for your specific team or project, go to the Space Tools menu and select Content Tools. Under the Templates option you can view and edit any of the templates included. If you’re a site admin you can also edit the global template to customize it company-wide.
At a glance: what did you just learn?
The key to agile requirements is building a shared understanding amongst your team. The best way to do this is creating your high level requirements doc in Confluence, and collaborating across development and design on crucial issues. Use our template as a guide, and customize it to fit your team or company’s workflow.
Here’s a rundown of what we covered:
- Product Requirements Blueprint: It does most of the work for you. Follow the page outline, and fill in content that makes sense for your specific requirement.
- Page properties macro: This macro makes it possible to create a reporting page across all your requirements. When using the blueprint it will be included on your page.
- Product Requirements index: Once you’ve created a few requirements pages, you can see all the high level details at a glance on an index page that Confluence automatically creates when you use the blueprint.
- Create Jira issues: Highlight text on the requirements page to quickly convert it to a Jira issue.
- File comments: Add your design files to the page and encourage discussion on them with pinned comments.
- Jira links: Just look in the page header to see all the Jira issues that are included in the requirement.
- Customizing Blueprints: You can edit any of the blueprints that come included in Confluence to fit your specific workflow.
This post is part of our latest collection, A Software Team’s Guide to Confluence. Click the lovely green button below to see the rest.
And if you found this article helpful, pass it on via the social network of your choice and help your fellow Confluence users create killer pages too!
New to Confluence? Try it free and start working better together, as a team.